As an Amazon Associate I earn from qualifying purchases. This page may contain affiliate links.
Store-bought lunch ideas for kids can save a busy household real time on school mornings without sending your child off with a sad, soggy sandwich. In this guide, you will learn how to build a balanced lunch from grocery store staples, which items hold up well until noon, how to set up a simple weekly shopping list, and what to avoid. The goal is a lunch you can assemble in about five minutes, that your kid will actually eat, and that does not depend on you having a spare hour on Sunday night.
Why Store-Bought Lunches Work for Busy Families
Packaged foods are not a failure of parenting. Many of them are portioned, shelf-stable, and designed to be eaten cold, which is exactly what a lunch bag requires. The trick is choosing items that cover the basic lunch categories instead of building the whole meal around snack foods. A good store-bought lunch usually includes a protein, a grain or starch, a fruit or vegetable, and something small for fun. When you shop with that structure in mind, you can mix and match from the aisles without planning every single day.
Step 1: Build a Simple Lunch Formula
Before you fill the cart, decide on a repeatable formula. Most parents find it easiest to aim for one item from each of four groups:
- Protein: cheese sticks, deli-style turkey or ham in a sealed pack, hard-boiled eggs from the refrigerated case, roasted chickpeas, or shelf-stable tuna or chicken pouches.
- Grain or starch: whole-grain crackers, pita chips, mini bagels, rice cakes, or single-serve whole-wheat tortillas.
- Produce: pre-cut apple slices with a fruit fresh packet, baby carrots, grape tomatoes, clementines, or cucumber rounds.
- Treat or dip: hummus cups, a small portion of dark chocolate, a fruit cup in juice, or a few pretzels.
If your child eats a lot at school lunch, you can drop the treat. If they come home starving, add a second protein or an extra fruit cup.
Step 2: Choose Items That Hold Up Until Lunchtime
A lunch sits in a backpack for three to five hours, often without refrigeration. Items that stay crisp, firm, and food-safe in that window tend to work best. Look for the following traits when you read labels and packaging:
- Shelf-stable or sealed packaging, such as foil pouches or individually wrapped portions.
- Cheese that is firm or string-style, which tolerates room temperature better than soft spreads.
- Crackers and chips that resist moisture, which usually means ones packed with a desiccant pouch or in a tight bag.
- Fruit that is whole or pre-cut with an acidulant packet to reduce browning.
Anything that needs to stay cold for food safety should go into a lunch bag with an ice pack. Perishable proteins like deli meat and eggs should be kept cold until eaten. The USDA recommends keeping perishable foods below 40°F, so use a freezer pack and keep the lunch out of direct sun.
Step 3: Shop the Right Sections
Grocery stores are organized so that a fast lunch is possible if you know where to look. Work through the store in this order:
- Refrigerated dairy and deli: string cheese, cheese cubes, yogurt tubes, hummus, deli meat, and hard-boiled eggs.
- Produce: pre-washed baby carrots, snap peas, clementines, grapes, and cut melon or apple slices.
- Snack aisle: whole-grain crackers, pretzels, popcorn bags, and fruit leather.
- Canned and pouched goods: tuna or chicken pouches, applesauce cups, and fruit cups packed in juice.
- Bakery or bread section: mini bagels, pita, and tortillas.
Stocking one item from each section every week gives you a rotation of at least a dozen lunch combinations without repeating the same menu every day.
Step 4: Assemble the Lunch in Under Five Minutes
Once your pantry and fridge are stocked, build lunches in a consistent order so the process feels automatic:
Set Up a Lunch Station
Keep the lunch bags, ice packs, and a bin of shelf-stable items together in one spot. A labeled bin for each child helps, especially if siblings have different preferences or allergies.
Use Divided Containers
Bento-style containers keep foods separated and reduce mess. They also make it easy to see at a glance whether a lunch includes all four groups.
Pack Heavy Items First
Place ice packs on the bottom, then the protein, then produce, and keep crunchy snacks on top so they do not crush.
Sample Weekly Lunch Plan
| Day | Protein | Grain | Produce | Treat |
|---|---|---|---|---|
| Monday | String cheese | Whole-grain crackers | Clementine | Small dark chocolate square |
| Tuesday | Hard-boiled egg | Mini bagel | Baby carrots | Fruit cup in juice |
| Wednesday | Hummus cup | Pita chips | Cucumber rounds | Pretzels |
| Thursday | Tuna pouch | Rice cakes | Grape tomatoes | Fruit leather |
| Friday | Deli turkey roll-up | Tortilla | Apple slices with fruit fresh | Popcorn bag |
Common Mistakes to Avoid
- Buying only snack foods. Chips, cookies, and fruit snacks can fill a lunch but leave out protein and produce. Keep at least one real food in every lunch.
- Ignoring food safety. Skipping ice packs with deli meat or eggs is a common error. When in doubt, add a freezer pack.
- Overbuying perishable produce. Pre-cut fruit and vegetables can go bad quickly. Buy a few days’ worth at a time.
- Forgetting your child’s input. Let kids pick two or three options each week. They are more likely to eat what they chose.
- Not checking school policies. Some schools limit nut products or certain packaged snacks. Check the handbook before you stock up.
Tips for Making Store-Bought Lunches Work Longer
- Create a standing grocery list with at least two options per category so you can swap items when something sells out.
- Buy family-size packs of cheese and crackers, then repackage them into reusable containers on Sunday.
- Rotate lunch items every two weeks to keep things interesting without adding planning time.
- Keep a small stash of backup lunch items in the pantry for mornings when the fridge is empty.
Recommended gear
A few simple tools make store-bought lunches faster and safer to pack.
- Bento-style lunch containers: Divided compartments keep items separated, so crackers stay dry and fruit does not get squished. View on Amazon
- Reusable ice packs: Slim gel packs fit flat in the bottom of a lunch bag and keep perishable items cold until noon. View on Amazon
- Insulated lunch bags: A bag with a thermal liner helps keep deli meat, cheese, and yogurt at a safe temperature. View on Amazon
If you are still deciding on a container style, our guide to Best Lunch Boxes for Family Meals on the Go: 7 Compared walks through the options side by side.
Making the Routine Stick
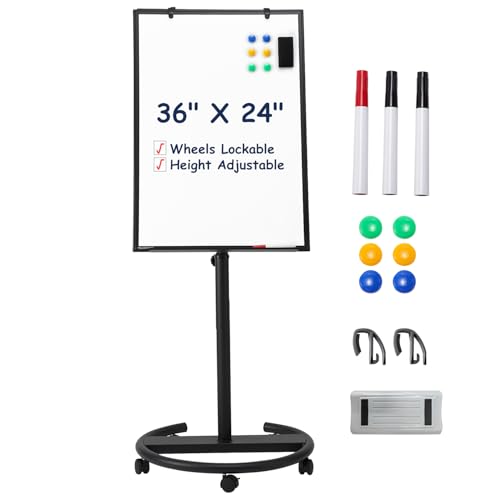
Store-bought lunches are easiest when they fit into a larger morning and evening rhythm. Setting out lunch bags and ice packs the night before, and keeping chores and clothing organized, reduces the morning scramble. For ideas on keeping the house running smoothly, see White Board Chore Chart: 7 Steps to a Setup Kids Actually Use and A Calm Evening Routine for Kids and Parents. If you need a clear space for lunch supplies, Family Storage Ideas That Prevent Tip-Overs offers safe storage options for pantry shelves.
FAQ
Are store-bought lunches healthy for kids?
They can be, as long as each lunch includes a protein, a whole grain or starch, and a fruit or vegetable. Check labels for added sugar and sodium, and treat snack-only lunches as occasional rather than routine.
How long can a packed lunch sit before it is unsafe?
Perishable foods such as deli meat, eggs, and dairy should be kept cold, ideally below 40°F. Use an ice pack and keep the lunch out of direct sun. If a food has been above 40°F for more than two hours, it should be discarded.
What are the easiest no-prep proteins to pack?
String cheese, shelf-stable tuna or chicken pouches, and individually wrapped turkey or ham are the quickest. Hard-boiled eggs from the refrigerated section also need no cooking on your end.
How do I keep crackers from getting soggy?
Pack wet or juicy items like cucumber or tomato in a separate compartment or sealed container away from crackers. Using a divided bento-style box solves most of this problem.
Can I pack store-bought lunches for a child with food allergies?
Yes, but read every label carefully, since cross-contact warnings and ingredient lists change. Check with your child’s school and, if needed, a registered dietitian or allergist before you rely on any specific product.
What if my child only eats the same thing every day?
That is common and usually fine for a while. Rotate one item per week and let your child choose a new option so the lunch stays familiar but slightly different.
How much should I spend on a week of lunches?
The answer depends on your store and region, so compare the shelf prices where you shop. Buying family-size packs and repackaging them at home tends to be the most economical approach.
Conclusion
Store-bought lunch ideas for kids can be fast, varied, and nutritionally sound when you build each lunch around a protein, a grain, a produce item, and a small treat. Stock your cart by section, use divided containers and ice packs, and let your child choose a few options each week. With a simple formula and a repeatable shopping list, you can put a good lunch in the bag in five minutes or less.