 By Emily Parker
Updated November 2026
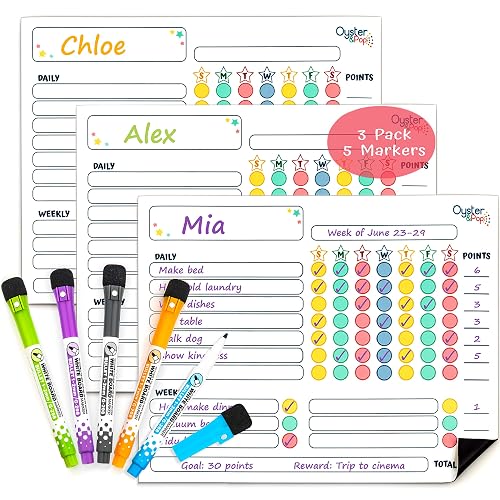
A chore chart made with Cricut is one of the easiest family organizers to build at home. You design the layout once in Cricut Design Space, cut the pieces from vinyl or adhesive material, and apply them to a whiteboard, acrylic panel or wood sign. The result is a reusable chart with clean lines that you can wipe down and update every week.
What You Need Before You Start
Gather your supplies first so you are not stopping halfway through the project. Most setups need only a few basics, and you can reuse the same chart for months.
Shopping for one? See our guide: 7 Best Dry Erase Board Chore Charts for Busy Families (2026).
- A Cricut cutting machine and a free Cricut Design Space account
- Permanent or removable adhesive vinyl in two or three contrasting colors
- Transfer tape and a weeding tool
- A smooth base surface such as a whiteboard, acrylic sheet or painted board
- A scraper or credit card for smoothing vinyl
Step 1: Plan the Layout on Paper
Sketch your chart before opening the software. Decide how many family members you have, how many chores each person handles, and whether you want days of the week across the top or down the side. A grid with one column per child and one row per day is the most common layout and the easiest to read at a glance.
Step 2: Build the Design in Cricut Design Space
Open Design Space and start a new canvas sized to your base surface. Use the Shapes tool to draw the grid, then add text boxes for names, days and chore labels. Keep fonts large, at least 36 points for headers, so they stay legible from across the kitchen. Add small icons next to each chore so younger kids can read the chart without relying on words alone.
Tips for Easy Weeding
Avoid tiny isolated pieces and very thin lines. Connect letters where your font allows, and use the Weld tool on connected shapes so the cut is cleaner and easier to peel.
Step 3: Cut and Weed the Vinyl
Load your vinyl mat-side down, select the material setting that matches your vinyl type, and cut. Once the cut finishes, remove excess material with the weeding tool, lifting the unwanted areas slowly. Work in good light and keep a small piece of tape handy to pick up stray bits.
Step 4: Transfer and Apply the Design
Cover the weeded design with transfer tape, press it down with a scraper, and lift it from the backing. Position it on the base surface, then burnish it from the center outward to push out air bubbles. Leave the transfer tape on for a few minutes, then peel it away at a low angle. Manufacturers of most adhesive vinyls recommend waiting at least 24 hours before wiping the surface with liquid, so plan your first cleaning accordingly.
Common Mistakes to Avoid
- Skipping the blade check. A dull blade tears vinyl and leaves ragged edges.
- Applying to a dusty surface. Clean and dry the base first, or the vinyl will lift at the corners.
- Using too much text. Short chore names work better than full sentences.
- Choosing permanent vinyl when you want to change chores. Removable vinyl lets you rearrange the chart without starting over.
- Rushing the transfer. Pulling the tape too fast can take small pieces with it.
Recommended Gear
- Cricut Joy: A compact cutting machine that suits small chart projects and fits on a crowded craft table. View on Amazon
- Cricut Premium Vinyl Variety Pack: Lets you test colors and finishes before committing to a full sheet. View on Amazon
- Cricut TransferTape: Keeps vinyl letters aligned during application, especially for longer chore lists. View on Amazon
FAQ
Can I use removable vinyl on a whiteboard?
Yes. Removable vinyl works well on smooth whiteboards and lets you rearrange chores when routines change. Test a small piece first to confirm it releases cleanly from your specific surface.
How do I make the chart wipeable?
Wait the full curing time recommended by your vinyl manufacturer before cleaning, then wipe with a damp cloth and mild soap. Avoid abrasive pads, which can scratch the vinyl edges.
Do I need a Cricut machine to make this chart?
A cutting machine makes the job much faster and more precise, but you can achieve a similar look by printing a stencil and cutting the vinyl by hand. Hand cutting takes longer and works best for simple, large-letter layouts.
Conclusion
A chore chart made with Cricut gives your family a clear, durable system that is easy to update. Plan the layout, cut and weed carefully, and apply the design to a clean surface. Once it is up, you will have a reusable tool that cuts down on daily reminders.
Related reading
- Cricut Chore Chart Template: 6 Steps to Make a Reusable Family Chart
- Work for Hire Chore Chart: A Step-by-Step Setup for Busy Families
- Work for Hire Chore Chart Printable: A Step-by-Step Setup for Busy Families
- Word Chore Chart Template: 7 Steps to a Printable Setup Your Family Will Use
- Whiteboard Chore Chart Ideas: 7 Setups That Keep Kids on Track
- White Board Chore Chart: 7 Steps to a Setup Kids Actually Use
Ready to choose one?
About Emily Parker
Emily Parker is part of our editorial team and reviews and edits our busy-mom life guides, checking product details against manufacturer specifications and owner feedback.