By Emily Parker
Updated November 2026
To make your own chore chart printable, you choose a simple layout, list your family’s regular tasks, add a grid for the days of the week, and format it in a word processor or free design tool. Then you print it, post it where everyone can see it, and reuse it every week. This guide walks through each step so you can finish a usable chart in about an hour, even if you have never designed a printable before.
Why Make Your Own Chore Chart Instead of Buying One
A homemade chart fits your household exactly. You decide how many chores appear, which family members get which tasks, and how much space each child needs to read the grid. Store-bought charts often come with fixed boxes and cartoon graphics that do not match your routine. When you make your own, you can also update it in minutes when a new chore is added or a child moves up an age group.
Shopping for one? See our guide: Free Printable Chore Chart with Money: 5 Best Options for Busy Families.
Step 1: List Every Recurring Chore
Start with a plain notepad, not a computer. Write down every task that repeats on a regular schedule. Think about daily, weekly, and “as needed” jobs separately so the chart does not get crowded.
- Daily: make beds, clear dishes after dinner, feed pets, set the table
- Weekly: vacuum a room, clean the bathroom sink, take out recycling, fold laundry
- Occasional: wipe the car, rake leaves, change bedding
Aim for no more than six to eight chores per person on the weekly chart. More than that and younger children stop checking it. If you want a broader overview of structure before you start designing, the article Template for Chore Chart: 7 Steps to a Printable Layout Kids Can Use shows how a layout comes together from the task list outward.
Step 2: Assign Chores by Age and Ability
Match each task to the person who can realistically finish it without a reminder. A preschooler can put toys in a bin and wipe a low table. A nine-year-old can load the dishwasher and sweep. A teenager can handle laundry from start to finish. Write each person’s name at the top of a column or row, then place their tasks beneath it.
Keep the workload roughly even across the household. If one child has four daily jobs and another has one, expect complaints. Rotating a few tougher chores every month helps keep things fair.
Step 3: Choose a Layout That Matches Your Household
Three layouts cover most families.
Grid Layout (Days Across, Chores Down)
This works best for families with school-age kids who can read. Days of the week run across the top, and each chore sits in its own row. Each cell gets a checkbox or a space to initial.
Column Layout (Names Across, Chores Down)
Good for households with several children who share a single chart. Each person gets a column, and the chores for that person fill the column. This is easy to scan at a glance.
Picture Layout (Icons Instead of Words)
Ideal for pre-readers. Use simple clip art or photos of each task, such as a toothbrush for brushing teeth or a broom for sweeping. Pair each picture with a short word so older siblings can read it too.
Step 4: Pick a Tool and Build the Chart
You do not need specialized software. The three most common options are:
- A word processor: Create a table with rows for chores and columns for days. Add borders, bold the headings, and insert checkbox symbols. Microsoft Word and Google Docs both handle this well.
- A spreadsheet: Use cells as your grid. Set the column width so each cell is large enough to write in, then turn on print gridlines or add borders.
- A free online design tool: Canva and similar platforms include chore chart templates you can edit. Replace the sample text with your own chores and names.
For a step-by-step example of building a table-based version in a word processor, see Word Chore Chart Template: 7 Steps to a Printable Setup Your Family Will Use.
Step 5: Set Up Your Page for Printing
Before you finalize the design, check these print settings:
| Setting | Recommended Choice | Why It Matters |
|---|---|---|
| Orientation | Landscape for 7-day grids, portrait for 2–3 person columns | Gives each cell room for writing |
| Margins | 0.5 inch on all sides | Prevents cutoff on home printers |
| Font size | 14 to 18 point for chores, 20+ for headings | Readable from across the kitchen |
| Paper | Standard 8.5 x 11 inch, or cardstock for durability | Heavier paper holds up better on the fridge |
| Color | Use color only for headings or check boxes | Keeps the chart readable on black-and-white printers |
Step 6: Print a Test Copy
Print one page on plain paper before you run off thirty copies. Check that nothing is cut off at the edges, that the text is dark enough to read from several feet away, and that the checkboxes are large enough for a child’s pencil. Adjust the row height or font size if anything looks cramped.
Step 7: Laminate or Protect the Chart
Once the layout works, decide how you will reuse it. A printed chart can be placed in a plastic sheet protector and checked off with a dry-erase marker, or you can laminate it for a more permanent setup. Some families print two copies, one for the current week and one as a clean master. A small binder or clipboard keeps the chart in one spot.
If you want a weekly approach that resets every Sunday, Weekly Chore Chart Printable: A Step-by-Step Setup for Busy Families covers how to schedule the reset so the chart stays current without extra work.
Adding Visuals and Rewards
Children often respond better when they can see progress. Consider adding a simple reward section at the bottom of the page. For example, five completed days could earn a small privilege such as picking the family movie. Stickers work well for younger kids, and checkboxes work for older ones who prefer a running tally. The article Sticker Chore Chart Printable: 7 Steps to a Setup Kids Will Use explains how to design a sticker-based version if that approach suits your family.
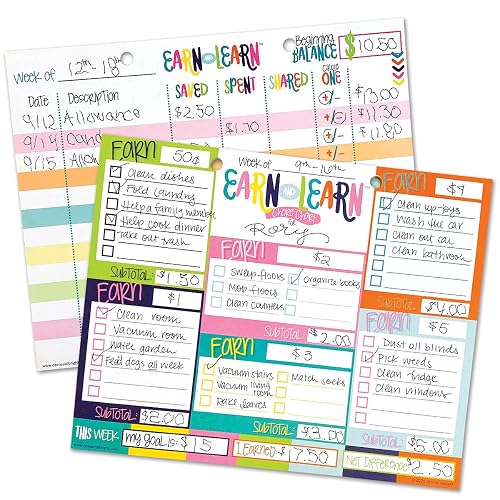
If your children are older and you want to connect chores with pay, a money column can be added. Keep the amounts simple and make sure you apply the system consistently. A financial professional or a family budgeting resource can help you decide how much allowance is appropriate for your situation.
Common Mistakes to Avoid
- Too many tasks on one chart. Keep it short enough that everyone can finish their list in under 30 minutes a day.
- Vague wording. “Clean up” means different things to different people. Write “pick up toys from living room floor” instead.
- Tiny text and cramped boxes. If you need to squint to read it, your kids will not read it either.
- No reset plan. A chart without a weekly reset quickly becomes a wall decoration.
- Skipping the test print. One sample page saves you from wasting ink and paper on a layout that does not fit.
- Changing the rules without warning. Talk through new chores or rewards before posting the updated chart.
Tips for Making the Chart Stick
- Post the chart at eye level for your children, not at adult height.
- Review it together on Sunday evening and let each child pick one chore they want to try next.
- Set a consistent check-off time, such as after dinner, so the habit forms quickly.
- Keep a blank spare printout in the drawer so a replacement is always ready when a page gets messy.
- Revise the chart every few months as children grow and take on more responsibility.
Recommended Gear
A few simple supplies make a homemade chart last longer and easier to update.
- Dry-erase markers: A set of fine-tip markers lets you check off tasks and wipe the chart clean each week. View on Amazon
- Clear plastic sheet protectors: These keep a printed chart clean and reusable without lamination. View on Amazon
- Laminator with pouches: A personal laminator creates a durable, wipeable chart that holds up to daily use. View on Amazon
- Magnetic clipboard or fridge clips: A clipboard keeps the chart in one place, and magnets let you hang it on the fridge. View on Amazon
FAQ
What is the easiest way to make a chore chart printable?
Use a free table template in Google Docs, Microsoft Word, or Canva. Enter your chores in the first column, your days or family member names across the top, and print the page in landscape or portrait depending on how many columns you need.
How many chores should go on a weekly chart?
Most families do well with six to eight tasks per person. Younger children often do better with three to five. Fewer tasks with clear wording tends to lead to better follow-through.
Can I make a chore chart for toddlers?
Yes. Use pictures instead of words and keep only two or three tasks. Simple icons, a large checkbox, and bright but limited colors help toddlers understand the routine.
Should I laminate the chart or use sheet protectors?
Both work. Sheet protectors are quicker and need no special equipment. Lamination gives a more durable surface for daily use, especially on the fridge or in a high-traffic area.
How often should I update the printable chart?
Review it every week or two and make changes when a child is ready for new tasks. A full redesign every six months or at the start of a new school year is a reasonable schedule for most families.
What if my children ignore the chart?
Check that the tasks are realistic, the wording is clear, and the chart is in a visible spot. Involving children in choosing their chores and agreeing on a simple reward often improves results within a few weeks.
Can I use the chart to pay allowance?
Yes, if you add a money column or a point system. Keep the rules simple and written at the top of the page so there is no confusion. If you need guidance on managing allowance in a way that fits your budget, a certified financial planner can offer tailored advice.
Do I need special software to make a printable chart?
No. Any word processor, spreadsheet, or free online design tool is enough. The most important part is keeping the layout simple, readable, and easy to reuse each week.
Conclusion
To make your own chore chart printable, list your recurring tasks, assign them by age, pick a layout, build the grid in a tool you already use, and test the print before you commit. A simple, readable chart with a weekly reset will do far more for your routine than an elaborate design you never update. Start with one page this weekend, and revise it as your family’s needs change.
Ready to choose one?
About Emily Parker
Emily Parker is part of our editorial team and reviews and edits our busy-mom life guides, checking product details against manufacturer specifications and owner feedback.